
How To Make Royal Icing With 3 Ingredients
Royal icing is like cement for the sugar craft and baking world. It is the delicious edible glue that bonds gingerbread houses together, used to pipe fancy, elegant decorations on cakes and cookies. So, it is really important to know how to make it.
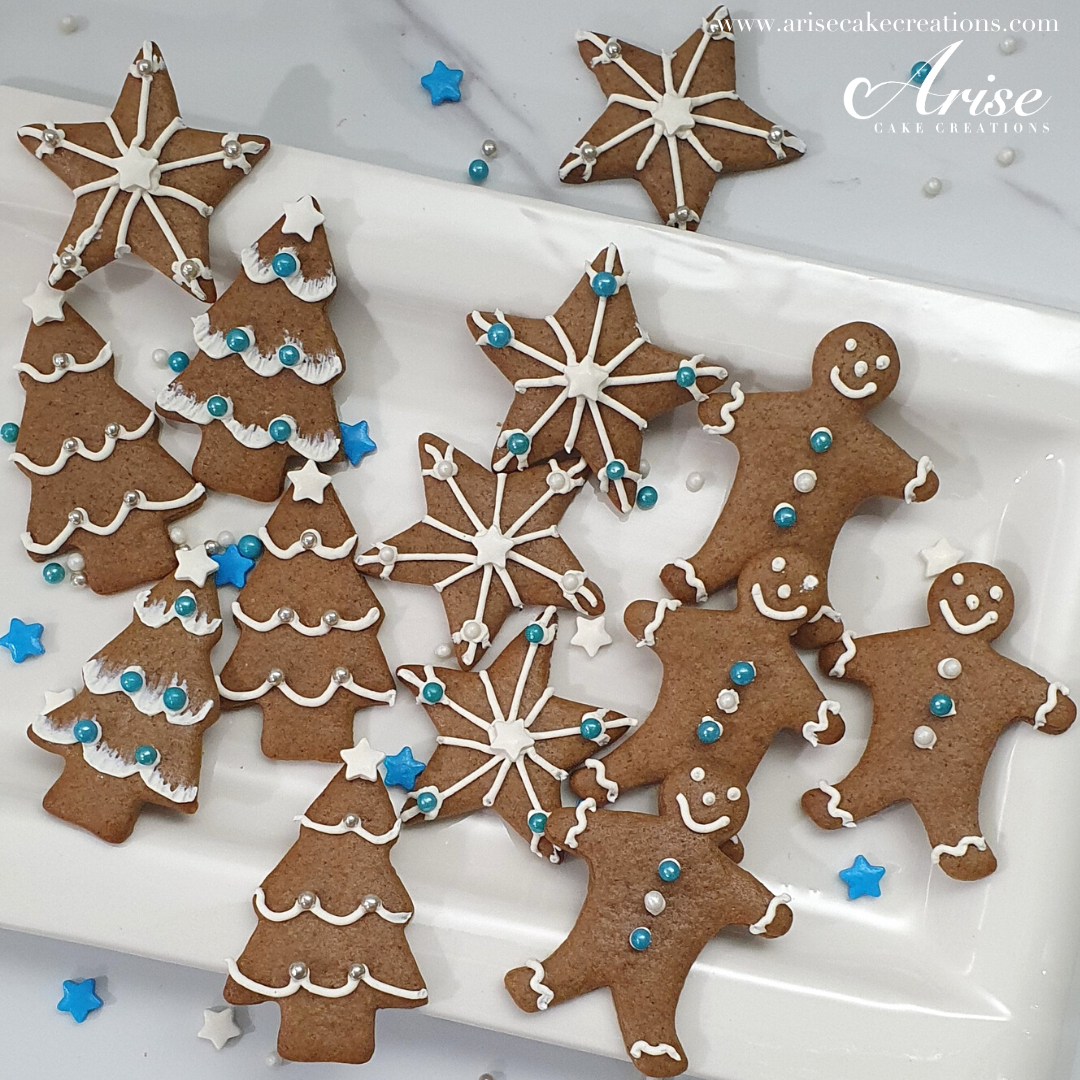
It is easy to work with, dries quickly and hard as long as there is not too much humidity and will turn your sugar cookies, gingerbread cookies, gingerbread house(s) and cakes into works of art.
The great thing is you only need 3 ingredients to make my classic Royal Icing, it is also a very adaptable recipe that can have extract flavours or add colour paste (gel) colours to it.
What is Royal Icing?
There are several methods that can be used to make royal icing, however no matter which method is used. The foundational ingredients remain the same - egg whites, icing sugar (also known as confectioner’s or powdered sugar) lemon juice or cream of tartar.
The 3 main methods are:
Raw fresh egg whites
I have seen another method of making royal icing without egg whites using water/non-dairy milk and corn syrup, however I have no idea, how strong it will be, since I have never tried it. This maybe something for me to try out for another blog, since it may be extremely useful if you are vegan.

How to Make Royal Icing
Using Raw Fresh Egg Whites
This is my favourite recipe to use. I unfortunately do not have easy access to meringue powder or pasteurised liquid egg whites in Thailand. Therefore use raw fresh egg whites, There are many that maybe worried about using raw egg whites. However, my thinking is that due the high sugar/low-moisture ratio, it does make it impossible for bacteria to thrive.
Important Notes:
Before whipping up any egg white, ensure that any bowls, whisk/paddle attachments are free from any fatty residue. You can give bowls and utensils a quick wipe down with some white vinegar using a clean cloth or kitchen towel.
Use a paddle attachment on a stand mixer or beat on low speed for a hand mixer, to ensure you do not beat in annoying air bubbles.
Only use gel food/paste/powdered colours to colour royal icing. Liquid colours will turn your beautiful royal icing into a wet mess.
Firstly separate the egg yolks from the egg whites. In a bowl of a stand mixer or bowl to use a hand mixer beat together the egg whites, add the cream of tartar whilst beating. Mix on low speed until thick. If you choose to do so, beat in the flavour extract until throughly combined. The royal icing should be thick and glossy.
Optional: Add gel or powered colours
Cooked Royal Icing
If you are concerned about using raw egg whites, you can cook the royal icing to 150°F (66°C) over a bain-marie (water bath), for three minutes or until it is hot to the touch and the the icing sugar has dissolved. The process for making the royal icing is exactly the same - beat egg whites, add cream of tartar, add icing sugar.
Optional: Add gel food/powered food colours
Royal Icing Consistency
Royal icing can be made into different consistencies, depending on what you want to use it for - either runny for doing ‘run-outs/flooding’ to evenly cover cookies or stiff for piping, sticking gingerbread houses or gingerbread centrepieces together securely.
The steps to adjust the consistency is super easy - If is too thick, add more water. If it is super watery and thin, add more icing sugar. You can use a spray, pipette or dropper bottle to control the amount of water you add.
I prefer to use a consistency of about 10-15 seconds, meaning when you lift the royal icing from the bowl, there will be a trail of when the icing falls back into the bowl. Counting it should take about 10-15 seconds for the trail of icing to completely blend back into the rest of the icing.
It can be a bit more tricker and messier to work with thinner royal icing, so maybe not the best option to use it like this, when decorating cookies with small children.
Decorating With Royal Icing
To get started and decorating fun royal iced designs. There are some handy tools that will help you to get the job done:
Disposable Piping bags - 12in size will be better for smaller children’s hand or the 16 inch size, which I prefer use, are suitable for bigger kids or adults.
Reusable Piping bags - These will need to be used with a coupler.
Coupler - Can be used with disposable or reusable piping bags, when you want the icing to be the same colour, but you want to switch the piping nozzles/tips.
Piping Nozzles/tips - You could get lost in a world of piping tips. You could start off super simple and use no nozzle and just cut of a small part of the tip in your disposable piping bag and pipe away.
Or if you are eager to purchase some piping tips, I suggest you only get the following tips to get started;
Wilton #4 for outlining and flooding, for finer more detailed work get a Wilton #1 or #2
The number of the piping tips reflect their sizes i.e #1 being the smallest - #12 being the largest of the round tips in the Wilton brand.
Toothpick or Scribe Tool - To help spread out the icing.
Gel food colouring - This PME set is great to get started with, they can be used with royal icing, cake mixture, buttercream, fondant etc. They are a high pigmentation so only a small amount of colour is required.
Storing Royal Icing
Never leave royal icing uncovered, it begins crusting and drys out really quickly. Either cover it with a damp towel or store in an airtight container with some plastic wrap touching the surface of the icing, until you are ready to use it.
Most royal icing recipes tend to yield a large batch including my own recipe. The great thing is royal icing can be frozen. To freeze royal icing place into zip lock bags, with all of the air expelled and keep them flat. Make sure you place coloured royal icing into separate zip lock bags. It can then be stored like this in the freezer for up to 3 months.
To thaw the royal icing - leave it to thaw overnight in the fridge, once thawed, leave on the work surface to come to room temperature. You may find it has separated, this is fine, you will just need to remix the royal icing to bring it back together. Adjust the consistency, as per the tips I gave above on Royal Icing Consistency.
Can Royal Icing Be Made Ahead of Time?
All methods of royal icing can be made about 2-3 days head of time, stored in air tight, with the icing wrapped well with plastic wrap in the fridge. When you are ready to use it, allow it to come to room temperature, then mix to bring together any liquid that may have separated.
Royal icing made with fresh egg whites needs to be used within 3 days (unless you decide to freeze, as per the instructions I given above).


How To Make Royal Icing Using Only 3 Ingredients
Ingredients
- 1lb (4 1/2 cups) Icing sugar
- 3 Large Egg whites
- 1/2 tsp Cream of tartar OR 1 tsp lemon juice
- 1 tsp Vanilla - Optional
- 1/2 tsp Almond extract - Optional
- 1/2 tsp Lemon extract - Optional
Instructions
- Firstly separate the egg yolks from the egg whites.
- In a bowl of a stand mixer or bowl to use a hand mixer beat together the egg whites, add the cream of tartar whilst beating.
- Mix on low speed until thick. If you choose to do so, beat in flavour extract until throughly combined.
- The royal icing should be thick and glossy.
- Optional: Add gel food or powered food colours
Notes:
- Before whipping up any egg white, ensure that any bowls, whisk/paddle attachments are free from any fatty residue. You can give bowls and utensils a quick wipe down with some white vinegar on a clean cloth or kitchen towel.
- Use a paddle attachment on a stand mixer or beat on low speed for a hand mixer, to ensure you do not beat in annoying air bubbles.
- Only use gel food paste/powdered colours to colour royal icing. Liquid colours will turn your beautiful royal icing into a sticky mess.
Calories
614.96Fat (grams)
0.06Sat. Fat (grams)
0.00Carbs (grams)
151.85Fiber (grams)
0.01Net carbs
151.83Sugar (grams)
148.50Protein (grams)
3.60Sodium (milligrams)
58.72Cholesterol (grams)
0.00